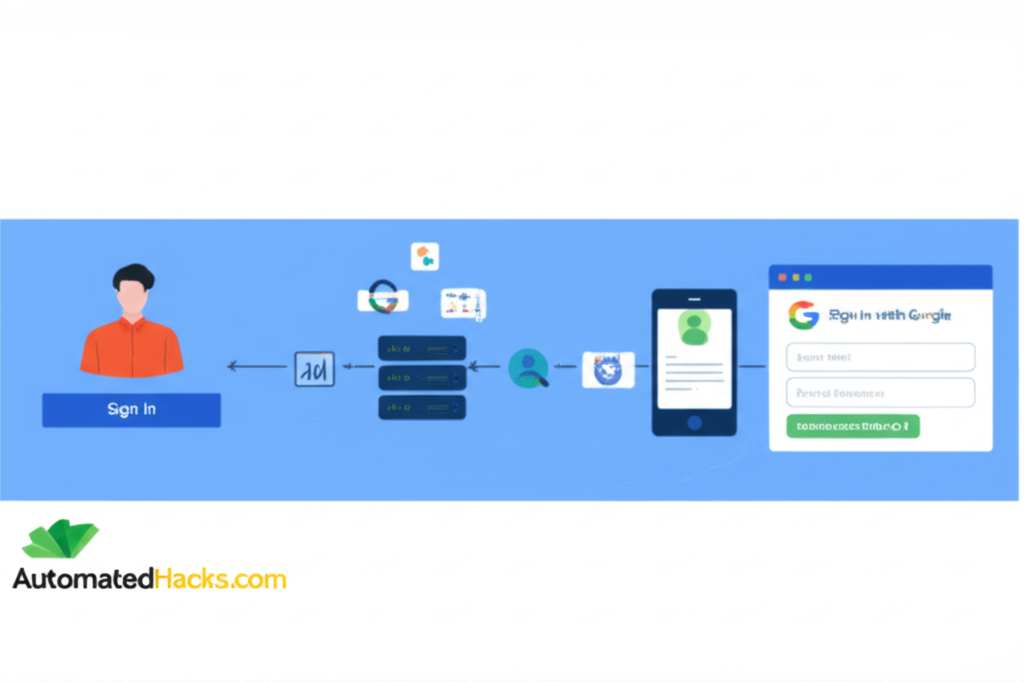
At AutomatedHacks.com, we’re always looking for ways to simplify processes and enhance user experience. One powerful tool in achieving this is integrating “Sign in with Google” on your PHP website. This feature not only streamlines the login process for your users but also offers significant benefits in terms of security and user acquisition. In this detailed guide, we’ll walk you through the exact steps to implement Google Sign-In, optimizing your website for both user convenience and search engine visibility.
Why Google Sign-In is a Game-Changer for Your PHP Website
In today’s digital landscape, users are often overwhelmed with the sheer number of accounts they need to manage. Offering “Sign in with Google” provides a frictionless alternative, allowing users to leverage their existing Google credentials to access your website. This leads to:
- Improved User Experience: Eliminate the need for new account creation and password management, reducing friction and encouraging more users to engage with your site.
- Increased Conversion Rates: A simpler login process can significantly decrease abandonment rates during registration and login.
- Enhanced Security: By relying on Google’s robust security infrastructure, you offload the responsibility of password management and benefit from their advanced security measures.
- Higher Trust and Credibility: Displaying the familiar “Sign in with Google” button can instill trust in new users.
- Valuable User Data (with Consent): Upon user authorization, you can access basic profile information like name and email, allowing for personalized experiences (always ensure you comply with privacy regulations).
AutomatedHacks.com’s Step-by-Step Guide to Implementing Google Sign-In in PHP
Implementing Google Sign-In involves a few key stages. Follow these steps meticulously to ensure a smooth integration.
Step 1: Setting Up Your Google Cloud Project and OAuth 2.0 Credentials
This initial configuration is crucial for establishing a secure connection between your website and Google’s authentication services.
- Access the Google Cloud Console: Navigate to https://console.cloud.google.com/ and log in with your Google account.
- Create or Select a Project: If you don’t have an existing project, click “Create Project,” provide a relevant name (e.g., “[Your Website Name] Google Sign-In”), and click “Create.” If you have a project you want to use, select it from the project dropdown.
- Enable the Google Sign-in API:
- In the left-hand navigation, go to “APIs & Services” and then “Library.”
- Search for “Google Sign-in API” and select it from the search results.
- Click the “Enable” button to activate the API for your project.
- Configure OAuth 2.0 Credentials: OAuth 2.0 is the industry-standard protocol for authorization.
- In the left-hand menu, go to “APIs & Services” and then “Credentials.”
- Click “Create credentials” at the top and choose “OAuth client ID.”
- Application type: Select “Web application.”
- Name: Give your client ID a descriptive name (e.g., “[Your Website Name] Sign-in Client”).
- Authorized JavaScript origins: This is a critical security setting. Enter the base URL(s) of your website where the Google Sign-In button will be used. For example, if your site is
www.yourdomain.com, enterhttps://www.yourdomain.com. If you’re testing locally, you might usehttp://localhost:8000(adjust the port as needed). Crucially, usehttps://for live websites with SSL. You can add multiple origins for different environments. - Authorized redirect URIs: This specifies the URL on your website where Google will send the user back after they successfully sign in. This is typically a PHP script that handles the authentication response (e.g.,
https://www.yourdomain.com/google-login.php). Ensure this URL is accurate. - Click “Create.”
- A pop-up will display your Client ID and Client Secret. Treat these credentials with utmost confidentiality! You will need them in your PHP code. You can also download these as a JSON file for later use.
Step 2: Integrating the Google Sign-in JavaScript Library
To enable the client-side functionality of Google Sign-In, you need to include Google’s JavaScript library in your HTML. Place this script tag within the <head> or before the closing </body> tag of your web pages where you want the “Sign in with Google” button to appear.
HTML
<script src="https://accounts.google.com/gsi/client" async defer></script>
This script provides the necessary functions to render the button and handle the initial sign-in flow in the user’s browser.
Step 3: Adding the “Sign in with Google” Button to Your HTML
Google offers a customizable button that you can easily integrate into your website’s HTML structure.
HTML
<div id="g_id_onload"
     data-client_id="YOUR_CLIENT_ID.apps.googleusercontent.com"
     data-context="signin"
     data-ux_mode="popup"
     data-login_uri="YOUR_REDIRECT_URI"
     data-auto_prompt="false">
</div>

<div class="g_id_signin"
     data-type="standard"
     data-size="large"
     data-theme="outline"
     data-text="sign_in_with"
     data-shape="rectangular"
     data-logo_alignment="left">
</div>
data-client_id: ReplaceYOUR_CLIENT_ID.apps.googleusercontent.comwith the actual Client ID you obtained from the Google Cloud Console.data-login_uri: SubstituteYOUR_REDIRECT_URIwith the URL of your PHP script that will process the sign-in data (e.g.,https://www.yourdomain.com/google-login.php). This must precisely match the “Authorized redirect URI” you configured in the Google Cloud Console.data-auto_prompt="false": Setting this tofalseprevents the Google Sign-In popup from appearing automatically on page load. Users will initiate the process by clicking the button. You can set it totruefor automatic prompting, but be mindful of user experience.- The attributes within the
<div class="g_id_signin">tag control the visual presentation of the button. Refer to the Google Identity Services documentation for various customization options regarding size, theme, text, shape, and logo alignment.
Step 4: Developing Your PHP Script to Handle the Sign-in Response (e.g., google-login.php)
This PHP script is the backend workhorse that processes the information Google sends after a successful sign-in.
- Receive the ID Token: Upon successful authentication, Google sends an ID token to the
data-login_urivia a POST request, typically under the parameter namecredential. - Verify the ID Token: This is a paramount security measure. You must verify the authenticity and integrity of the ID token on your server using Google’s official client libraries or by directly calling Google’s token verification endpoint. Never trust the ID token directly from the client-side.
- Decode the ID Token: Once verified, the ID token contains valuable user information encoded in JWT (JSON Web Token) format. You’ll need to decode this token to access the user’s details (e.g., email, name, profile picture).
- Authenticate or Create User Account: Based on the decoded information, you should either:
- Find an existing user in your website’s database that matches the Google email address. If found, log them into your website by establishing a session (using PHP’s
$_SESSION). - If no matching user exists, you can create a new user account in your database using the information from the ID token. Subsequently, log the newly created user in.
- Find an existing user in your website’s database that matches the Google email address. If found, log them into your website by establishing a session (using PHP’s
- Establish Session and Redirect: After successful authentication (either existing or new user), set up a session for the user on your website to maintain their logged-in state across different pages. Finally, redirect them to a logged-in area of your site (e.g., their dashboard or profile page).
Below is a foundational example of your google-login.php script (assuming you’ve installed the Google API client library for PHP using Composer):
PHP
<?php

require_once 'vendor/autoload.php'; // Ensure Composer autoloader is included

// Your Google API Client ID and Secret (keep these secure!)
$clientID = 'YOUR_CLIENT_ID.apps.googleusercontent.com';
$clientSecret = 'YOUR_CLIENT_SECRET';
$redirectUri = 'YOUR_REDIRECT_URI'; // Must match the one in Google Cloud Console

$client = new Google_Client(['client_id' => $clientID]);

if (isset($_POST['credential'])) {
    $idToken = $_POST['credential'];

    try {
        $payload = $client->verifyIdToken($idToken);

        if ($payload) {
            $googleId = $payload['sub']; // Unique Google user ID
            $email = $payload['email'];
            $name = $payload['name'];
            $firstName = $payload['given_name'];
            $lastName = $payload['family_name'];
            $profilePicture = $payload['picture'];
            $isEmailVerified = $payload['email_verified'];

            if ($isEmailVerified) {
                // At this stage, the user's Google identity is verified.
                // Now, integrate with your website's user management system.

                // Example: Check if the user exists in your database by email
                // $user = $this->userModel->getUserByEmail($email);

                // if ($user) {
                //     // Log in the existing user (set session variables)
                //     $_SESSION['user_id'] = $user['id'];
                //     $_SESSION['user_name'] = $user['name'];
                //     header('Location: /dashboard');
                //     exit;
                // } else {
                //     // Create a new user account
                //     $newUserId = $this->userModel->createUser($name, $email, $profilePicture, 'google');
                //     $_SESSION['user_id'] = $newUserId;
                //     $_SESSION['user_name'] = $name;
                //     header('Location: /profile');
                //     exit;
                // }

                // For demonstration purposes, let's just display the user info:
                echo "<h1>Sign-in Successful!</h1>";
                echo "<p>Name: " . htmlspecialchars($name) . "</p>";
                echo "<p>Email: " . htmlspecialchars($email) . "</p>";
                echo "<img src='" . htmlspecialchars($profilePicture) . "' alt='Profile Picture'>";

            } else {
                echo "Error: Google email address not verified.";
            }
        } else {
            // Invalid ID token
            echo "Error: Invalid Google ID token.";
        }
    } catch (Google_Auth_Exception $e) {
        echo "Error: " . $e->getMessage();
    }
} else {
    echo "Error: No Google ID token received.";
}

?>
Key Considerations for Your PHP Script:
- Install Google API Client Library: Use Composer to install the official Google API Client Library for PHP: Bash
composer require google/apiclient - Replace Placeholders: Ensure you replace
YOUR_CLIENT_ID,YOUR_CLIENT_SECRET, andYOUR_REDIRECT_URIwith your actual credentials obtained from the Google Cloud Console. - Database Integration: The commented-out sections illustrate where you would integrate with your website’s database to manage user accounts. Implement your own logic based on your database schema and framework.
- Session Management: Utilize PHP’s session management functions (
session_start(),$_SESSION) to maintain the user’s logged-in state. - Security Best Practices: Always sanitize user input, use prepared statements for database queries, and implement other relevant security measures to protect your website and user data.
Step 5: Testing and Deployment
- Thorough Testing: Rigorously test the entire Google Sign-In flow in various scenarios. Ensure the button renders correctly, the Google sign-in popup functions as expected, your PHP script accurately receives and verifies the ID token, and users are successfully logged in or have their accounts created. Test with multiple Google accounts.
- HTTPS Requirement: For security reasons, Google Sign-In requires your website to be served over HTTPS in a production environment. Ensure you have a valid SSL certificate installed.
- Privacy Policy: Update your website’s privacy policy to clearly explain how you collect, use, and store user information obtained through Google Sign-In. Transparency is crucial for user trust and compliance with data privacy regulations.
SEO Benefits of Implementing Google Sign-In
While Google Sign-In primarily focuses on user experience, it can indirectly contribute to your website’s SEO:
- Reduced Bounce Rate: A smoother login process can lead to fewer users abandoning your site during registration or login, thus potentially lowering your bounce rate – a positive signal for search engines.
- Increased User Engagement: Easier access can encourage more users to interact with your website’s content and features, leading to increased time on site and page views, which are positive SEO factors.
- Improved Mobile Experience: Google Sign-In simplifies login on mobile devices, contributing to a better mobile user experience, which is crucial for mobile-first indexing.
- Potential for Richer User Data (for personalization): While respecting user privacy, the basic profile information obtained (with consent) can allow for personalized content and experiences, potentially leading to higher engagement and satisfaction.
Conclusion: Empower Your Users and Website with Google Sign-In (Courtesy of AutomatedHacks.com)
Implementing “Sign in with Google” on your PHP website, as detailed by the experts at AutomatedHacks.com, is a strategic move towards enhancing user convenience, bolstering security, and potentially improving user engagement metrics that can indirectly benefit your SEO efforts. By following this comprehensive guide, you can seamlessly integrate this powerful feature and provide a smoother, more trustworthy experience for your valued users. Stay tuned to AutomatedHacks.com for more tips and tricks to optimize your website and streamline your online processes!